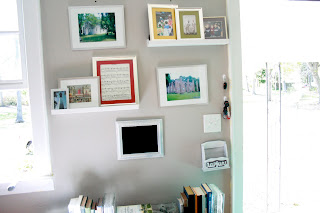
I absolutely love the idea of chalkboards. We have a giant one in our office. I love that Jose and I can leave each other notes since sometimes our paths do not cross for a few days. I decided to scale down this concept and put a mini chalkboard into our entry way gallery wall. I wanted a space to leave happy notes that we would see as we were leaving to begin our days.
This was probably one of the fastest, cheapest, and easiest craft projects to date. It took me thirty minutes from start to finish. (that's including drying time between coats.) And the cost was practically free. I bought a frame with no glass in it from the thrift store months ago and we already had chalkboard paint left over from painting the large one in the office. Also I had some foam poster board left over from the fabric built ins I made a few weeks ago but if you do not have this on hand the Dollar Tree sells large sheets for a buck. I dare say this is the first project I have had everything on hand already. (Imagine me jumping for joy because I feel like a real blogger now!)
 |
| Never mind imagining I will show you my dorky happy face. |
So here's what I did:
Step One: Gather all supplies. I used foam poster board as the backing but I am sure you could use just about any sturdy, paint-able board.
Step Two: Cut the foam board to the size of your frame.
Step Three: Shake the crap out of the two year old chalkboard paint. All while dancing around your house and getting judgmental looks from the dog and cat. (Oh you bought yours today. Well then skip this step because the handy shaker at the hardware store did this for you)
Step Four: With a foam brush lightly brush on one coat of chalk board paint. Let this coat dry and apply two more coats the same way.
Step Five: Let the chalkboard paint dry in the sun until dry to the touch.
Step Six: Pop your brand new chalkboard into its frame and hang on the wall
Step Seven: Wait very impatiently to write on your new chalkboard for about a day. (oh if your are not an impatient person like me then just wait patiently)
Have you guys done any quick craft projects lately? If so I would love to hear about them. Just leave me a comment. I would love to hear what you have been up to and what you think of my mini chalkboard.
Linking up today at:


No comments :
Post a Comment